UNBOXING AND STORAGE
Our standard 2’x4′ format is shipped flat in a box accommodating up to 15 sheets depending on the variety. Our XL (4’x8′) panels are rolled or shipped on pallets (depending on the order quantity). To ensure safe handling, we heat the sheets before rolling them. Each box can hold up to 5 XL formats.
UPON RECEIPT
When opening the packaging, please do so carefully to avoid scratching the material! Upon receipt, inspect the corners and the edges of the pallet or box(es) for damage and have the carrier acknowledge any issues.
Claims. We are not responsible for damages or loss occurring during transit. Merchandise must be inspected immediately upon receipt. Damages or non-conformities must be reported to the delivery agent (immediately) and to our Customer Service (within 48 hours of receipt, maximum). Customer is responsible to note specifics about damages at time of delivery. Take as many pictures as possible of the products and its packaging (in a way that the shipping label will be visible)! If damage is concealed and not determined until the item is unpacked, keep the packaging and notify us immediately after opening the box(es). Customer Service must be notified of missing or incorrect parts no more than 48 hours after receipt!
UNBOXING AND UNROLLING XL FORMATS
For better handling, lay the 2’x4′ FLEXX SLATE® panels flat and let them acclimate to room temperature 24 hours before installing.
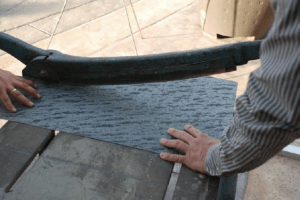
For the XL panels that have been roll-packed, it is very important not to force them to unfold (it may cause them to crack)! If it is warm outdoors, just let them under the heat of the sun until they unfold and flatten by themselves. If this is not possible, then heat them (with the help of a heat gun) over a large area and lay them out flat before processing. Avoid unrolling the material too quickly or when it is cold to prevent damage. Ensure no cracking sounds are heard during unrolling. The ideal temperature for unrolling is between 86°F and 158°F.
MATERIAL QUALITY
Small stone chips are not considered damage but are a quality feature of the natural stone surface. Despite these chips, the Flexx Slate sheet is usually undamaged, with the stone surface intact.
Slight superficial scratches may occur due to storage and transport, but these can be easily wiped away with a lint-free cloth and do not damage the material.
STORAGE
Store the material horizontally and flat to prevent deformation. Keep it in a dry, frost-free place, protected from sunlight, and avoid severe temperature fluctuations to prevent deformation.
PREPARATION
For better handling, lay FLEXX SLATE® panels flat and let them acclimate to room temperature 24 hours before installing.
Remove all dirt, dust, grease and any other loose debris from the building element’s surface (substrate) prior to applying the adhesive. Make sure the surfaces are sound, even and thoroughly dry. Both physical or/and chemical treatment can be used for a perfect cleaning.
Whenever a primer or solvent is recommended by the adhesive manufacturer, the bond must be tested by the installer prior to final installation.
For new construction with new drywall be sure to prime the surfaces with recommended primers first. Drywall dust is like dirt and, if not properly prepared, bad adhesion will occur.
Concrete and masonry substrates must be at least 28 days old! Hydrostatic pressure conditions and vapor transmission cannot exceed 3 lbs. per 1,000 sq. ft. (1,36 kg per 92,9 m2) per 24 hours using a calcium chloride test (reference ASTM).
Whenever a primer or solvent is recommended by the adhesive manufacturer, the bond must be tested by the installer prior to final installation.
Depending on the adhesive used, it may be necessary to prepare the back of the Flexx Slate Panels by sanding or scuffing the back to expose the fiberglass.
If needed, use a straight trowel for back-filling of voids. Any bumps/sags in the back surface should be sanded flat prior to back-filling. The back of Flexx Slate Panels may require a filler type adhesive to back-fill or level out voids of the natural slate sheets. It is always best to back-fill or back-butter voids or depressions in the material before application to a substrate.
If the application is outdoors, consideration to thermal expansion should be taken into account. Since Flexx Slate Panel is micro thin, it must expand and contract the same as the substrate to which it is applied or de-lamination may occur (grout-joint installation and/or expansion gaps become necessary).
A preliminary dry fit of Flexx Slate Panels allows for arrangements and orientation of individual sheets, patterns, textures, and colors before final placement. It is recommended that each sheet be dry fit exactly where it will be placed on horizontal or vertical surfaces. Numbering the sheets to track relocation before cutting and trimming is recommended and will save time.
CUTTING AND DRILLING
Cut and fit materials before applying adhesive. The use of metal shears is recommended for cutting Flexx Slate Panels. However, cutting straight lines and curves using long nosed tin snips would work as well.
Flexx Slate Natural Stone Panels can also be cut with strong scissors, wet saw, table saw with carbide/diamond blade, or an angle grinder with an (ultra) thin disc. For drilling and routing use tools commonly employed for wood or stone. Leave a small gap under the molding for expansion and follow panel manufacturer’s recommendations.
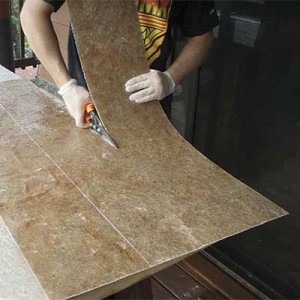
IMPORTANT: For a seamless cutting and to avoid flaking, always cut the material with the stone coat facing downward.
INSTALLATION
The information below is for our classic, marble, metallic, and sand stone veneers. The Flexx Slate ECO stone veneers can be installed in ways similar to the wallpaper or wood veneers installation (see complementary information on the “Recommended Adhesives” section of this page).
Spread the adhesive over the substrate AND the back of the stone panel, using a V-notched trowel 3/16” wide x 1/4″ deep. A different method is to use a manual or pneumatic gun to apply the adhesive directly on the back of the panels and the substrate, forming several 1/4″ – 3/8″ zigzag beads. The beads on the substrate should be oriented 90° with respect to the beads applied on the veneer backing.
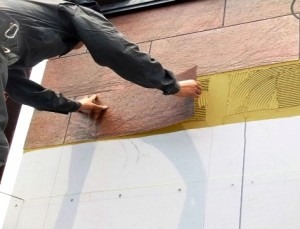
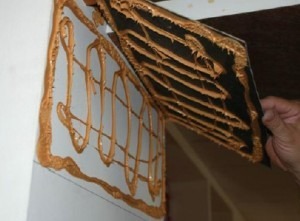
Complete coverage of the veneer backing is necessary for a secure bond (refer to adhesive instructions).
Position and firmly press panels to the bonding surface. Starting in the center of the sheet and using a roller or hand pressure, work any trapped air out towards the edge of the sheet. Do not press too hard while rolling as this may cause back-filled areas to push adhesive out and leave an air void. By proper pre-back-filling and using good rolling techniques a solid, hard surface will be achieved.
TIPS:
1) Since it is a natural material, thickness and traction of the stone is not uniform in all places, thus sagging may occur. Before applying the adhesive on the veneer backing, you may want to lay it down flat first and check if the panel has any sags on its surface. If sags are present on the back of the sheet, make sure you fill them completely first. The same process must be applied for the substrate. If not done yet, please go back and read carefully the “Preparation” section above for more details.
2) It is better to have the stone sealed before starting installation. That will offer a better protection in case any adhesive residues, grout, dirt, or grease get on its surface (see “Sealing” section below too). Be prepared to remove any stain immediately, by using a wet cloth first and a dry cloth second (never the other way round).
3) When applying edge to edge, it is advisable to sand the edges to insure smooth transitions.
4) When installing stone panels around an outer corner where two walls meet, the raw edges of the tiles can be concealed and have a clean transition by beveling the two pieces. Beveling on a stone panel is the method of angling the edge of a tile back to 45-degrees on its underside. When two tiles beveled at 45 degrees meet at a corner, they wrap around it to form a 90-degree outside angle. Once installed, sand the edge to leave a smooth finishing.
The alternative is to install an edge or corner profile. Schluter Profiles offers a great variety of products, although you should feel free to buy from any other brand.
5) In case you intend to use our products to clad a custom shower, be aware that you need to waterproof your walls and floor before. Again, Schluter Shower Systems offers a number of excellent solutions for that purpose but feel free to use any guaranteed alternative you can find on the market.
6) Flexx Slate® Panels can be bent in the same manner as plastic laminate products. The fiberglass-polymer composite strand used in manufacturing the flexible stone veneer gives it strength and flexibility. Flexx Slate® Panels can be bent inward, or arched outward, depending on the desired need. It can be bent or flexed to a radius of 18” along the 48” length. With the assist of heat smaller radii can be achieved. The 24” width will also have a slight flex, but it is not recommended for bending. Due to the nature of the different thickness of the individual sheet, the degree of radius varies per item. We recommend testing the flex of the considered item prior to final installation.
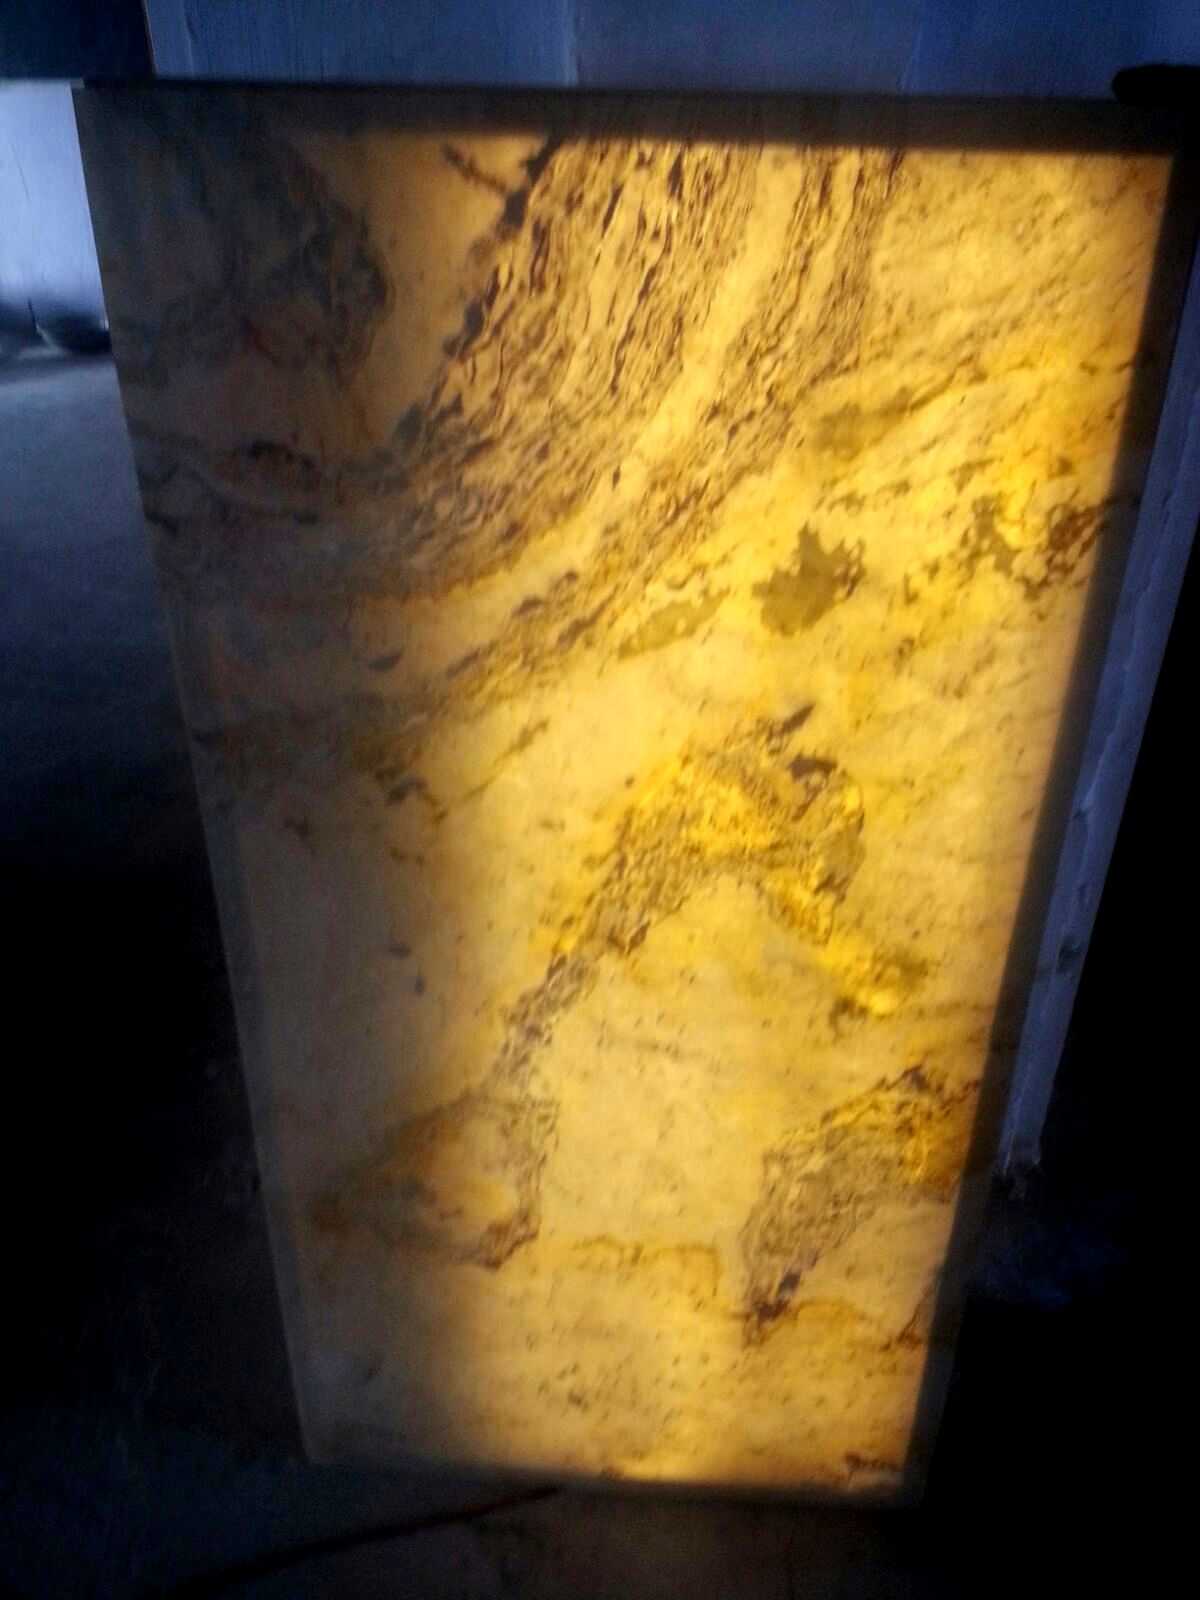
TRANSLUCENT PANELS
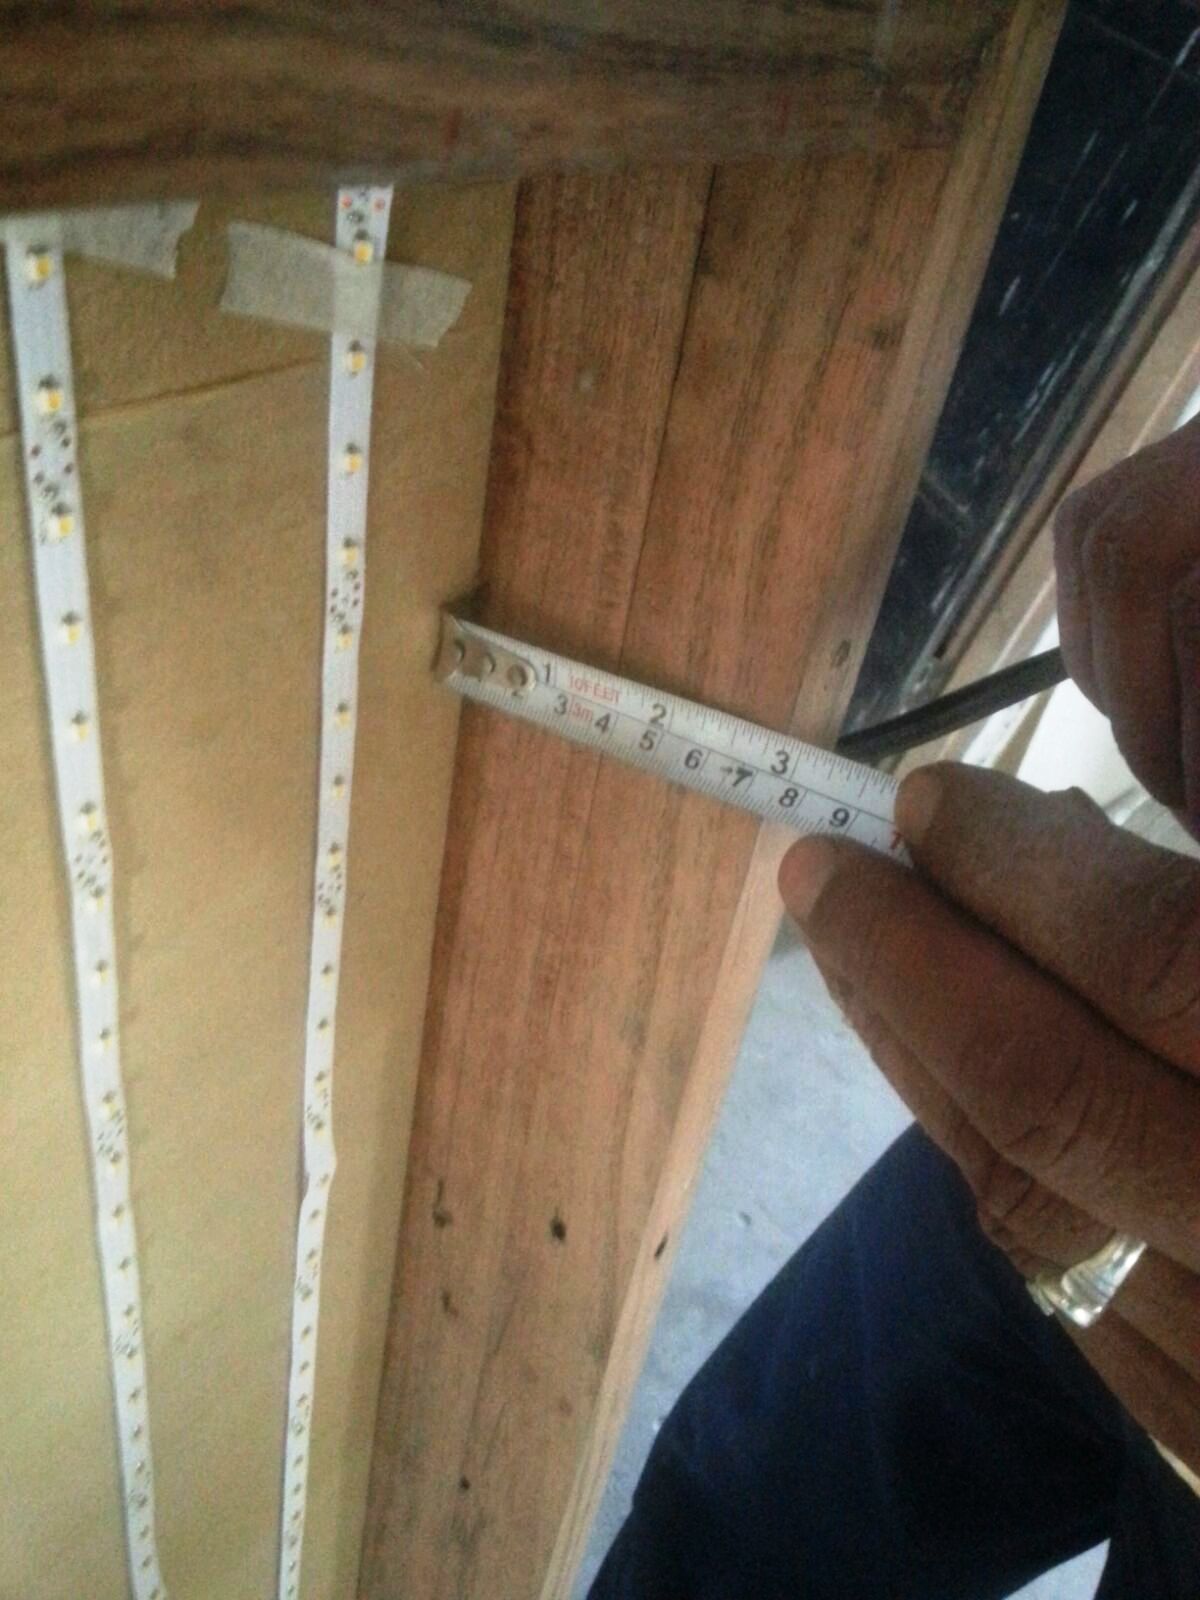
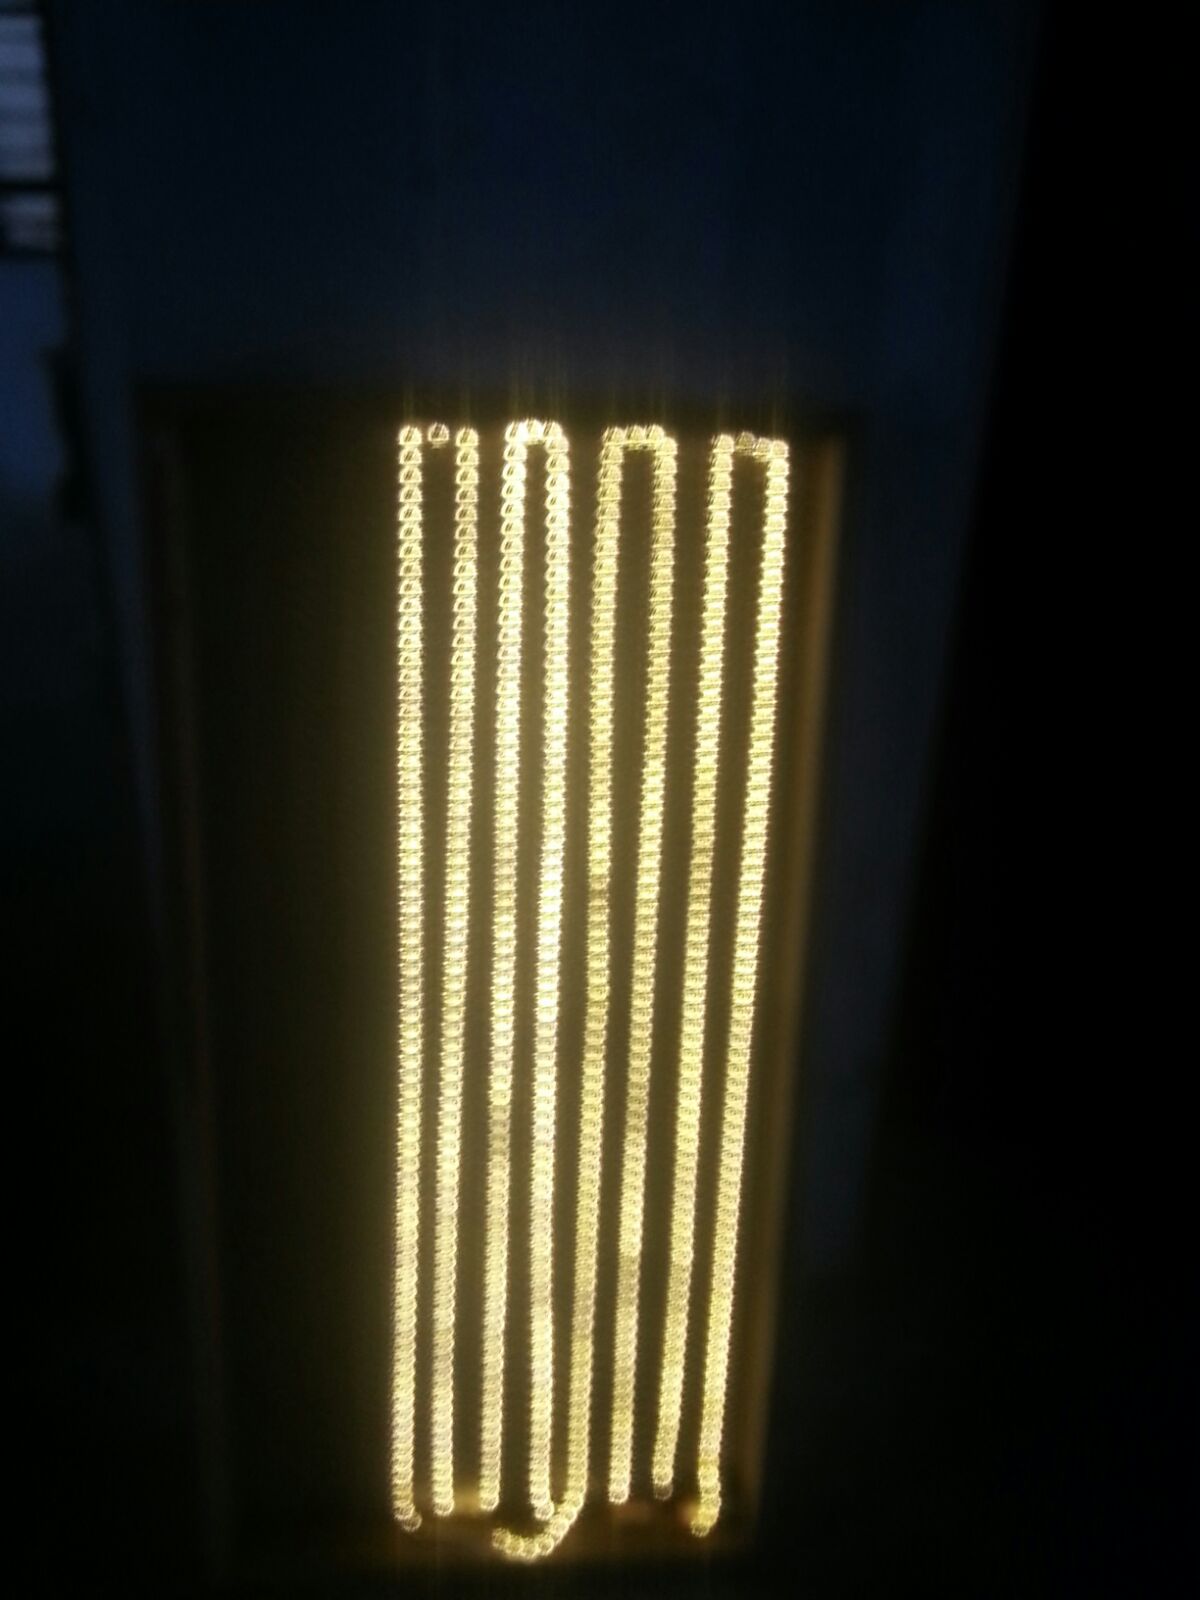
For best results with back light installation of our translucent panels, we recommend using LED strip lights, placed at about 3″ behind the sheet, in paralleled rows fixed at 1.8″ from each other, approximately. This way, you will enjoy a warm and evenly distributed light through the entire surface. Alternatively, LED panel lights may be a faster and easier choice. The panel can be applied on top of a thin frame made out of (L or U-shaped) aluminum, steel, or wood profiles. If large panes of translucent stone are used for ceiling or even walls, in order to prevent them from loosening and deforming due to weight, you may wish to place a thicker clear acrylic sheet (like Plexiglass®) as a backing, behind the stone veneer panel, and add random drops of Loctite® Epoxy Clear Multi-Purpose adhesive (or similar) to secure the two pieces together.
TIP: you can create different visual effects by playing with distinct colors of a RGB LED strip or by painting/splashing with colors certain areas of the stone panel.
FLOORING
As a flooring, FLEXX SLATE® is great in both dry and wet areas (like custom showers) and feels good to walk on. Finished floors look beautiful and are a non-slip surface. FLEXX SLATE® can be used for flooring if the proper adhesive, sealant, and installation techniques are applied. Since FLEXX SLATE® is not a thick solid stone it is not recommended for high traffic areas, due to erosion. It can be used for low traffic flooring areas (for barefoot walking), such as residential areas or bathrooms (where wet traction is expected).
Installation on heavy traffic floors is possible though, if a polyurethane or epoxy resin coating (prior testing required) is applied on the stone surface.
For new installations, FLEXX SLATE® is best adhered over most standard sub-floor materials such as cement board and backer board usually in the ½” to ¼” thickness range. Using a layer of cement board or backer board over plywood floors will result in a more solid feel to the finished floor. This can further help with crack prevention in some cases.
Our ECO stone veneers are not apt for flooring.
SEALING
Depending on usage, natural stone requires different surface protection coatings like glossy, matte, environment protective, anti-static, fire retardant coatings, or water sealants. It is recommended that Flexx Slate Panels be sealed in the same manner as most slate and/or stone tiles are, at all times, and especially when they are to be exposed to water, salts, acids, grease, or weather inclemencies. Please follow manufacturer’s instructions for best results.
Some colors of FLEXX SLATE® offer better traction than others. For example, “Legacy” or “Fiery Cliffs” (both of them quartzite stone) will have more texture than some of the other softer slate colors. Sealers will have an effect on the traction of the surface of each FLEXX SLATE® color. Therefore, it is recommended that various sealers be tested prior to final installation when considering FLEXX SLATE® especially for flooring.
It is best to pre-seal the natural stone sheets prior to installation. This protects and seals the face from adhesives and grouts during installation and handling. As sealants are offered in varying degrees of luster or sheen, we recommend that you confirm the reflectance prior to complete installation to get the desired effect.
Here and here are a couple of useful articles regarding the selection and application of a proper sealant.
Also, if you are looking for a recommendation, you may find Miracle Sealants products at hand, although you should feel free to use any other brand selling sealants particularly designed for slate stone (we do not endorse or advertise a specific one).
GROUT JOINTS
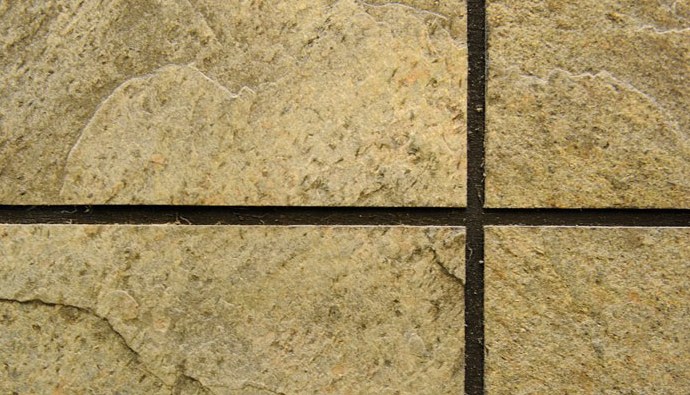 Flexx Slate® panels can be used to create a tiled effect by leaving a grout joint between cut pieces of material. For indoor applications only, the sheets may also be butt-jointed for the look of a smaller seam (never advised for outdoor applications). Due to the thin nature of the Flexx Slate Panels, a 1/8″ to 3/16″ grout joint will produce better results. Epoxy grouts are the most recommended and available in many colors to match or coordinate with the different colors of Flexx Slate Panels. Finally, clean up the epoxy with a sponge. Again, having the panels sealed before installation, will make it easier to remove any residues of grout or adhesive from the stone surface.
RECOMMENDED ADHESIVES
It is the installer’s responsibility to make sure the adhesive fits for the type and conditions of the materials to be bonded together. All adhesives should be tested prior to any installation including consideration of moisture and temperature in the planned environment. If the application is outdoors, consideration to thermal expansion should be taken into account.
FLEXX SLATE Panels backing is a non-porous material. The adhesive you choose should be either for “non-porous” to “porous” or for “non-porous” to “non-porous” materials bonding, depending on your substrate. Also, both the operating and the service temperature range have to be taken into account when selecting the right adhesive for you project. Where adhesive primers are recommended, the bond should be tested by the installer before final installation. Please, read carefully the manufacturer’s recommendations.
A single-component thixotropic polyurethane adhesive is best for most of the applications – interior and exterior. Sikabond Construction Adhesive and Sikaflex 11FC are among the best adhesives for the Flexx Slate Panels as they are flexible, paintable and work for almost all kind of substrates and conditions: cement-based materials, brick, ceramics, glass, metals, wood, epoxy, polyester and acrylic resin.
TITEBOND offers a wide range of adhesives specific for any material, especially for trowel applications.
For porous substrates:
- Titebond Green Choice Fast Grab FRP Adhesive (1 gal, 3.5 gal & 4 gal pails)
- Titebond Green Choice Heavy Duty Construction Adhesive (10.5oz or 29oz cartridge & 3.5 gal pail)
For non-porous substrates:
- Titebond Green Choice Advanced Polymer Panel Adhesive
- Titebond® Fast Set Polyurethane Construction Adhesive or Titebond® Ultimate TiteGrab Adhesive
*See a full list of the Titebond adhesives installation guide HERE (PDF).
Other adhesive examples may include: different polyurethane adhesive (like Mapeflex P1, Loctite PL Premium Construction Adhesive or PL 530, wood glues, Ultrabond ECO 905), thick latex-type adhesives (use ONLY where air-drying can take place and not recommended for outdoors applications), construction grade multi-purpose adhesives (e.g. “Liquid Nails Panel & Foam”), double-sided foam adhesive (“peel and stick”).
The back of the Flexx Slate Panels may require a filler-type adhesive in some cases (or polyester-based gap filler putties like Bondo and similar). Polyurethane wood glues work well for most applications to board materials by foaming slightly to fill gaps.
ATTENTION! Do not use contact adhesives!
For our ECO stone veneers, glues designed for wallpaper or wood will work just fine.
SAFETY PRECAUTIONS
Precautions must be taken when working with Flexx Slate Panels due to the fiberglass composition in the backing materials. When using a saw, ALWAYS be sure to take proper precaution to cover skin, eyes and nose from fiberglass dust. When cutting Flexx Slate Panels with saws, grinders, or sanders, ALWAYS properly filter exhaust equipment.
Avoid breathing silica dust. This product when cut, drilled, or abraded produces dust containing Free Silica which may cause cancer or delayed lung injury (Silicosis) if inhaled. Work in a well ventilated area. Please wear safety glass and a dust mask.
CARE
All natural stone surfaces, even if they are impregnated (sealed), must be regularly cleaned with a damp cloth. For best results, use a lint-free cloth.
Some FLEXX SLATE variations have more texture than others and may constitute a rough surface, creating cleaning challenges, because dirt and other contaminants lodge in the surface. Especially try to keep grease away from the slate panels, as it is a highly absorbent material and you may not be able to remove the spots! Extra attention is necessary to assure contaminants are removed promptly.
Do not use acid cleaners as they may etch the surface of the stone!
Reapply sealer every 3-5 years (or sooner – see manufacturer’s recommendations) to keep FLEXX SLATE panels in good condition for a lifetime.
For more information, you may wish to read this and this useful articles.
RECOMMENDED INSTALLERS - LOCATIONS
If you are looking for an experienced installer in your area, we may be able to recommend someone. Here are some locations where you can count on professional service:
- AR – Hot Springs, Little Rock area
- CA – Yucaipa, San Bernardino, (Los Angeles area)
- GA – Atlanta
- MI – Ypsilanti, Ann Arbor, Detroit area
- NC – High Point
If technical support is needed, call or drop us a line and we will help you communicate with one of our product specialists. Put your projects in good hands!
IMPORTANT NOTICE
All users of FLEXX SLATE® products are solely responsible for compliance with local building codes and guidelines.
The information herein is offered in good faith based on FLEXX SLATE’s most updated researches and it is believed to be accurate. FLEXX SLATE® keeps the right to modify the specification without previous notice.
If you have any doubts or need more detailed information, please contact our Technical Support team.
TECHNICAL DOCUMENTATION AVAILABLE ON REQUEST.